I’m definitely not the first person to have this idea. As a matter of fact, I’m pretty sure I saw another YouTube post or web article on this a bunch of years ago. But who cares. Information is information and there’s nothing new under the sun!
SO, you wanna build a pedalboard that is unique and fresh? How about using a vintage suitcase? It’s important to realize that a vintage suitcase is probably not gonna be road-worthy. The walls are thin, the latches are old (picture below) , the hinges are flimsy (picture below). You’ll really need to be prepared to enjoy this for a season and possibly add duct tape in the future to keep it closed. haha
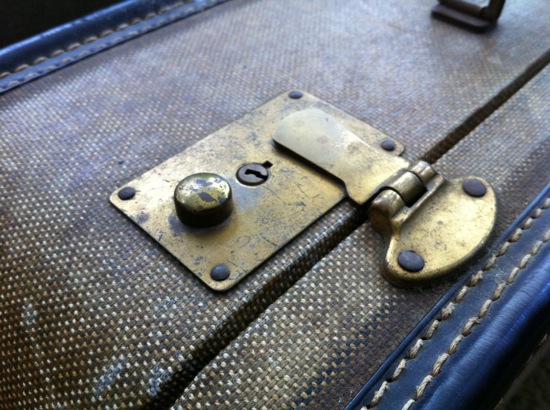
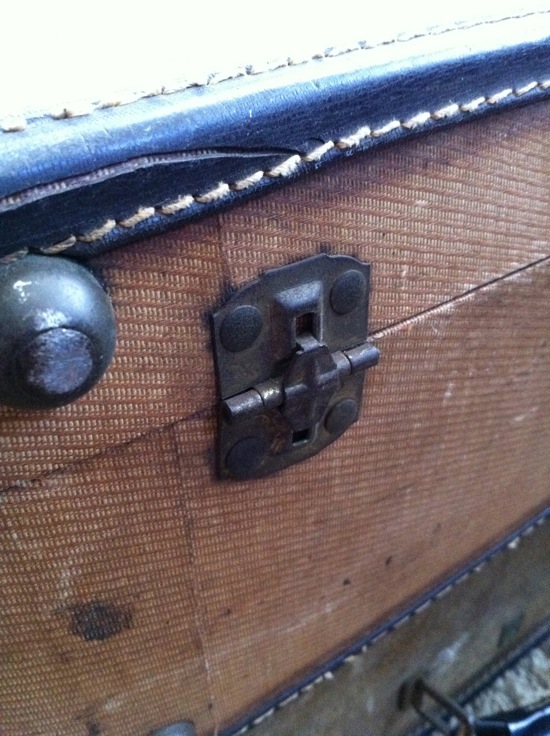
STEP ONE is to find a suitcase. A medium sized suitcase is just fine. It’s roughly 15 to 20″ wide and about 10 to 14″ tall. The depth is normally 5 or 6″. I found one of mine on eBay for $10 with $10 in shipping and I found another one on a guitar forum for $25 shipped. Here is roughly what you’re looking for:
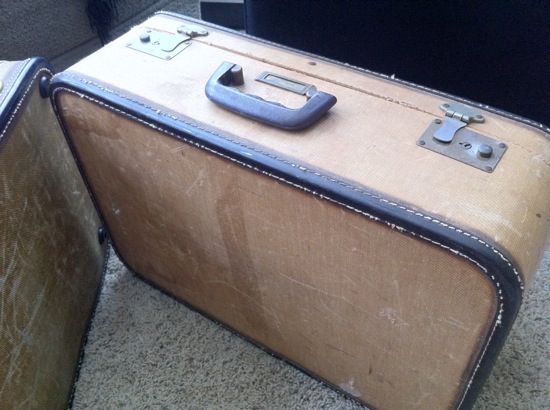
STEP TWO is to grab the supplies. You’ll need:
• a piece of plywood (or similarly flat material- I think even plexiglass would be cool) that is 1/2″ thick. When you cut it to size, you’ll need to make sure you round the corners because we will be using the lid of the suitcase as your floorboard and the corners are rounded.
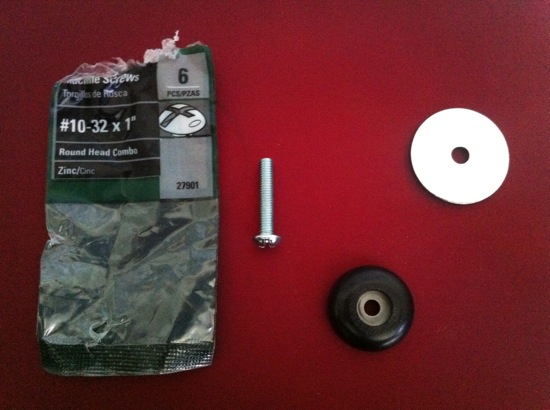
• Rubber feet with washers built in
• threaded screws with a nut. I used #10-32 screws that were 1″ long. That made it pretty tough since the lid was slightly thicker. You may want to use 1-1/2″ screws just to be safe.
• large washers for the top side of the board.
Here is a pic of these things:
STEP THREE is to place the board into the lid and use a drill to screw through both the wood and the lid. Once the hole is drilled, put the screw into the rubber foot and push that up through the lid so that it protrudes through the wood. You want the feet to be on the bottom like this: 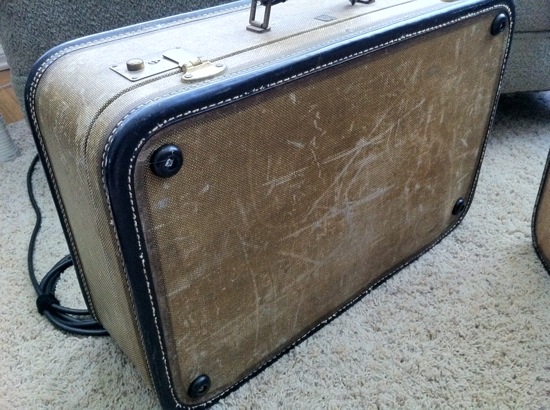 Then place the washer over the screw and tighten the nut down. I would get the first nut tightened down before you even drill the second corner out. That way it’s not too difficult to get all the holes to line up. This is what it looks like when one corner is finished:
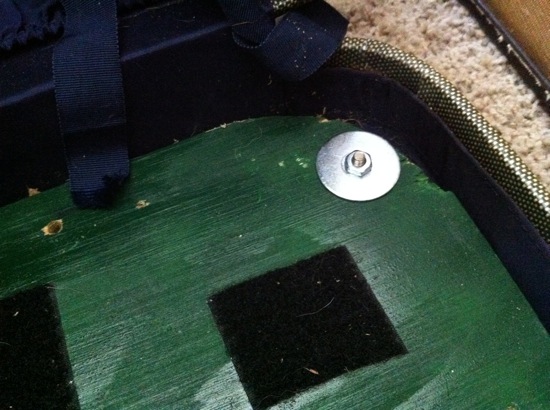
STEP FOUR (THE LAST STEP) is to load up the piece of plywood with max-strength velcro or dual-lock and then fit your pedals down. Keep in mind that you’ll need to close the lid periodically to make sure that it closes without bumping into a pedal or cable.
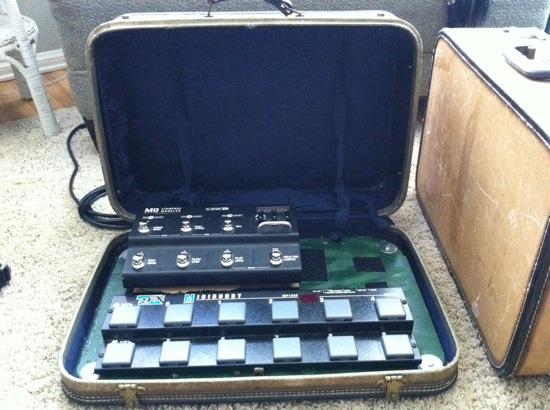
As seen below, I loaded mine up with a MIDI Controller and a Line 6 M9 that I run into stereo cabs for a big sounding rig in a cool looking package. While some may choose to pull the lid all the way off and replace the hinges with new latches, I actually like the open lid in front of me since it allows me to put setlists, a cocktail, extra supplies, a picture of my wife, Bible verses, shrine to Eddie Van Halen etc. in there.


Comments on this entry are closed.
How to make the other pedal raised higher?
Hi Eduardo,
To raise up the other pedals, I cut an additional piece of plywood and screw or glue it down. Also, PedalTrain makes some prebuilt risers for sale. You can find those here… http://pedaltrain.com/products/accessories/booster.php
Love the idea man. I’m actually getting a Line 6 M9 soon, and you’re the first one I’ve seen with a homemade pedal board like this that has one. One thing though, where is your power supply brick? Or do you have one? Thanks.
Michael.
I am currently using a few different supplies, depending on how big the board is. For my big board, I have a Voodoo Lab Pedal Power 2+, which is most commonly used on larger boards. On a smaller backpack board, I’m using the Dunlop DC Brick, which is in a stompbox-sized enclosure. For the smallest boards, I’m using a Visual Sound 1-Spot which is just a wall-wart adapter and a daisy chain string of tips to power all the pedals.